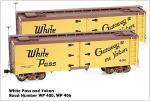
Kitbashing 12 flat cars for Jeff's WP&YR
By Jeff Hohlstein. Much cargo traveled by flat car in the period 1970 - 1982, so when the opportunity arose to acquire 12 IHC (International Hobby Corp.) flat cars, RTR (ready to run), I jumped on it. Now, RTR implies that all one has to do is repaint them and away you go. Not! The RTR units came “correctly weighted” according to the manufacturer, but weighing in at 1.5 oz. each, were only 44% of the NMRA standard weight. They also had plastic wheels and toy couplers. After three months of labor, they were ready to commission.
The flats were 34.5 scale feet in length, so first, I had to identify the flats I could duplicate. Most WP&YR flats were 30’ or 30’ 11” long, but there were three wood plank deck, one plywood deck and eight steel deck (all steel side) units that were 33 to 35’ long. These were selected for modeling.
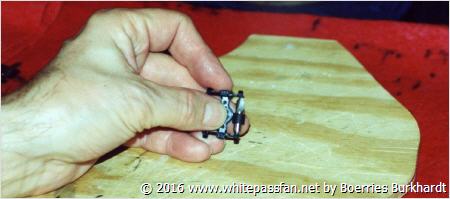
Truck Modification. I replaced the plastic wheels with metal wheels, Kadee 520 smooth back freight car wheels. First, I reamed out the journal boxes with a Reboxx Exxact Socket Hand Tool Item #T-100 (pictured). This formed a clean 60 degree conical side frame journal that meets NMRA Standard. Then I installed the metal wheels.
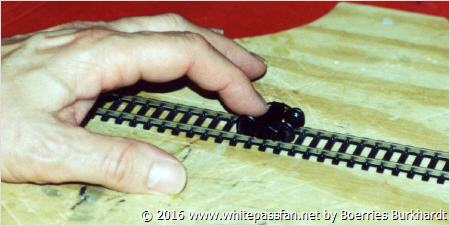
Tracking performance. If one takes an RTR truck with plastic wheels and moves it over the track as pictured and applies some side pressure, then repeats the process with a modified truck, the improvement is immediately obvious. The modified truck has no slop. It tracks smoother, straighter and has less rolling friction. And the metal wheels are easier to keep clean. This means less derailments.
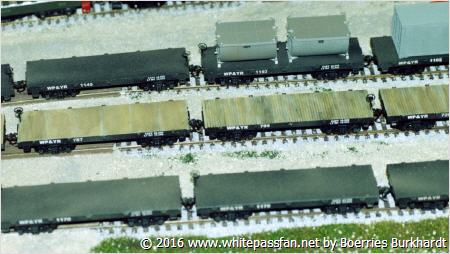
Deck construction. The RTR decks were left intact on the three plank decks (729, 785, 861). On the remaining ones. I sanded off about half of the thickness of the plank deck and used an Exacto knife to remove the plank overhang along the sides of the flat.
I made the plywood and steel decks from .020 Evergreen sheet styrene. I used a razor saw to cut half way through the thickness of the plastic to create the separation between plywood panels (787), and the back side of the point of an exacto knife to create the same effect on the steel decks (1145, 1170, 1179, 1181, 1183, 1184, 1185, 1191). I stressed the plywood deck with both knives and saws. I created the rivet patterns on the steel decks by turning the decks upside down and using the point of a compass to poke out the rivets. To get a smooth, uniform line, I used a six inch perforated steel ruler that had hole patterns 2/32’ apart. Then I glued the decks onto the tops of the flats.
As a side note, the container pictured is a 25’ 3” container, kit-bashed from two 20’ ISO containers. I’m going to wait to finish this until I see what Fred Shannon produces. The Anvil ore containers were made from Marcus Zoschg’s kits.
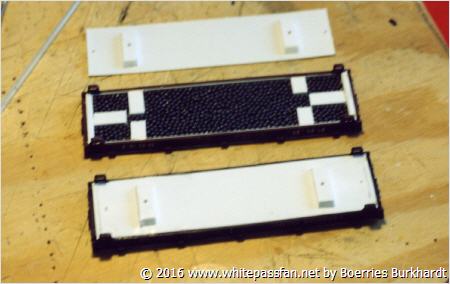
Weight box construction For rolling stock to perform well on rough track, through curves, and pull what’s behind it properly, NMRA recommends standard weights based on gauge and car length. These flats are 4.75” long. The NMRA standard for HO that length is 3.4 oz. (one oz., plus ½ oz. for each inch in length). HOn3 would be 2.5 oz. for this length (3/4 oz., plus 3/8 oz. for each inch in length). This posed unique problems because there is almost nowhere to hide weight on a flat. I decided to make a box of the flat frame and fill it with A-Line pourable lead. Pourable lead is not a liquid as the name could imply. It is actually pellets, .080 in diameter (pictured center).
I discarded the RTR bases and made my own (pictured top). Then I created box walls inside the frame using .080 x .020 styrene strips. This created a beveled edge to glue the base onto, high enough to accept the pourable lead and allow the base to be glued in flush with the bottom edge of side of the flat. I lined the inside floor of the box with Scotch double-backed sticky tape to hold the lead in place until the base was glued into place. I added styrene supports over where the truck bars and coupler boxes would fit. Then I filled the box with pourable lead and glued the base into place (pictured bottom). Although I wasn’t able to achieve NMRA Standard, the flats weighed in at 2.7 to 2.9 oz., approximately 82% of standard. Although my equipment is HO, the HOn3 Standard was achieved and since my equipment is closer to HOn3 in length, that standard is probably more appropriate.
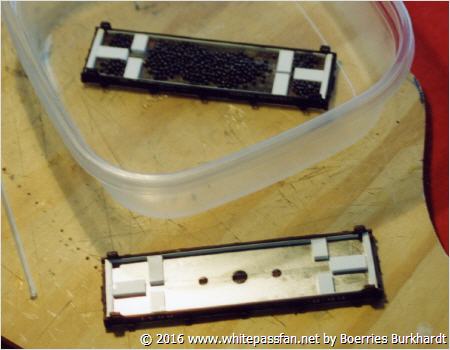
Safety and lead. Except for creating weight, lead is not exactly good stuff to have around. It’s wise to handle it carefully and not spill any in the house. I chose the box approach because I wanted to seal the lead in where it couldn’t contaminate anything over time. This pourable lead has a mind of its own and will go anywhere it is allowed. To avoid unintended contamination, I put the flats in a plastic container for loading (pictured top), that would catch the “escapees”. Note the discoloration in the box pictured bottom. That had been partially filled with lead and the discoloration is lead that had rubbed off the pellets.
Painting. I airbrushed a primer coat of Poly Scale E/L Gray on the entire flat. Then airbrushed the steel deck flats engine black. For the wooden decks, I air brushed the decks with a base coat of Model Master Camouflage Gray. Then I hand painted the decks, with streaks of Model Master Wood and Dark Tan. I used a relatively dry brush and applied both colors while still wet so they could be blended. I completed the process by brushing the decks with an India Ink/alcohol wash . I hand painted the steel sides and bases of the wood deck flats with Engine Black, so as not to ruin the decks with potentially leaky masking.
After decaling, I airbrushed the steel sides, steel decks, bases and trucks with a thin layer of Poly Scale Dirt to weather them, then sealed them with Poly Scale Dull Coat.
Decaling. I created the decal images using Microsoft Excel. Since most home printers cannot print the color white (they print clear and rely on the white paper), I made the letters white surrounded by black. I used a laser jet printer to print them onto Micro-Mark white decal paper. Even though I sprayed them with fixative per the manufacturer’s instructions, I found that the black ink chipped badly during cutting. I solved the problem using the following process: (1) Cut the decals oversize; (2) dip the decal into water and separate the decal from its backing into a puddle of water on a piece of glass (I use a 4”x 4” mirror). The decal is now soft and the paint won’t chip when cut with a NEW razor blade; (3) trim the decal close to the number/letter edges; (4) transfer the decal to the model; (5) brush with setting solution such as Microscale Micro Sol; (6) let dry thoroughly.
Coupler Modification. I replaced the couplers with Kadee #58, which is the standard for my layout.
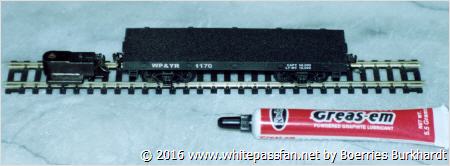
Final assembly, adjustment and tune-up. After final painting, I attached the trucks and couplers, adjusted the couplers to meet NMRA standard, applied Kadee Greas-em to the coupler boxes and reinstalled the wheel brake handles.
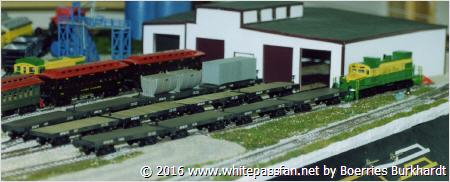
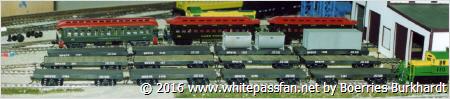
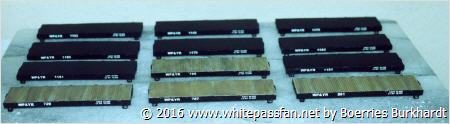
Project news. Here is another angle of the twelve flats. I have suspended my series on modeling because I have received no feedback on the usefulness of the articles. However, I will continue to publish project news such as contained herein.